Media
When creating content in Grav, you often need to display different types of media like images, videos, and various other files. These files are automatically found and processed by Grav and are made available to use by any page.
This is particularly handy because you can then use the built-in functionality of the page to leverage thumbnails, access metadata and modify the media dynamically (e.g. resizing images, setting the display size for videos, etc.) as you need them.
Grav uses a smart-caching system that automatically creates in-cache copies of the dynamically generated media when necessary. This way all subsequent requests can use the cached version instead of having to generate the media all over again.
Supported Media Files
The following media file types are supported natively by Grav. Additional support for media files and streaming embeds may be added via plugins.
| Media Type | File Type |
|---|---|
| Image | jpg, jpeg, png |
| Audio | mp3, wav, wma, ogg, m4a, aiff, aif |
| Animated image | gif |
| Vectorized image | svg |
| Video | mp4, mov, m4v, swf, flv, webm, ogv |
| Data / Information | txt, doc, docx, html, htm, pdf, zip, gz, 7z, tar, css, js, json, xml, xls, xlt, xlm, xlsm, xld, xla, xlc, xlw, xll, ppt, pps, rtf, bmp, tiff, mpeg, mpg, mpe, avi, wmv |
A full list of supported mimetypes can be found in the system/config/media.yaml file. If there is a mimetype that is not currently supported, you can simply create your own user/config/media.yaml and add it in there. Just ensure you follow the same format as the original system file. The simplest approach is to copy the whole original file and make your edits.
Where to put your media files
Usually you'll use a media file within a page, so just put the file in the page folder, and you can reference it in the Markdown of the page, for example:

If you want to put all your images in a single folder, you can put them in a user/pages/images folder. That way, in Twig, you can reach them via
{% set my_image = page.find('/images').media['my-image.jpg'] %}
and also you can find them easily via markdown and perform operations on them:

Alternatively you can put them in your theme, as that is easily accessible via CSS references or from a markdown file by using theme:// stream:

Another option is user/images, where you can use image:// stream to access them:

You can actually use any stream including any folder inside user/ via the user:// stream:

You can also do these same kinds of things using the Twig Media object:
{{ media['user://themes/mytheme/images/my-image.jpg'].html()|raw }}
Tip
Grav has an /images folder. Do not put your own images in that folder, as it hosts Grav auto-generated, cached images.
You may also want to put all the media files into their own folder, so that they can all be accessed at one go. For instance you might want to keep all your MP3 files in a folder user/pages/mp3s (not visible) and put the name of the MP3 file associated with a particular page in a header field called thistrack. If you then wish to access the file for a particular page and play it using the HTML5 audio element, you will need code like this:
 1<audio controls>
 2  <source src="{{ page.find('/mp3s').media[page.header.thistrack~'.mp3']|e }}">
 3</audio>
Display modes
Grav provides a few different display modes for every kind of media object.
| Mode | Explanation |
|---|---|
| source | Visual representation of the media itself, i.e. the actual image, video or file |
| text | Textual representation of the media |
| thumbnail | The thumbnail image for this media object |
Tip
Data / Information type media do not support source mode, they will default to text mode if another mode is not explicitly chosen.
Thumbnail Location
There are three locations Grav will look for your thumbnail.
- In the same folder as your media file:
[media-name].[media-extension].thumb.[thumb-extension]wheremedia-nameandmedia-extensionare respectively the name and extension of the original media file andthumb-extensionis any extension that is supported by theimagemedia type. Examples aremy_video.mp4.thumb.jpgandmy-image.jpg.thumb.pngFor images only! The image itself will be used as thumbnail. - Your user folder:
user/images/media/thumb-[media-extension].pngwheremedia-extensionis the extension of the original media file. Examples arethumb-mp4.pngandthumb-jpg.jpg - The system folder:
system/images/media/thumb-[media-extension].pngwheremedia-extensionis the extension of the original media file. The thumbnails in the system folders are pre-provided by Grav.
Caution
You can also manually select the desired thumbnail with the actions explained below.
Links and Lightboxes
The display modes above can also be used in combination with links and lightboxes, which are explained in more detail later. Important to note however is:
Tip
Grav does not provide lightbox-functionality out of the box, you need a plugin for this. You can use the FeatherLight Grav plugin to achieve this.
When you use Grav's media functionality to render a lightbox, all Grav does is output an anchor tag that has some attributes for the lightbox plugin to read. If you are interested in using a lightbox library that is not in our plugin repository or you want to create your own plugin, you can use the table below as a reference.
| Attribute | Explanation |
|---|---|
| rel | A simple indicator that this is not a regular link, but a lightbox link. The value will always be lightbox. |
| href | A URL to the media object itself. |
| data-width | The width the user requested this lightbox to be. |
| data-height | The height the user requested this lightbox to be. |
| data-srcset | In case of image media, this contains the srcset string. (more info) |
Actions
Grav employs a builder-pattern when handling media, so you can perform multiple actions on a particular medium. Some actions are available for every kind of medium while others are specific to the medium.
General
These actions are available for all media types.
url
Caution
This method is only intended to be used in Twig templates, hence the lack of Markdown syntax.
This returns raw url path to the media.
{{ page.media['sample-image.jpg'].url|e }}
html
Caution
In Markdown this method is implicitly called when using the ![] syntax.
The html action will output a valid HTML tag for the media based on the current display mode.

{{ page.media['sample-image.jpg'].html('My title', 'Some ALT text', 'myclass')|raw }}
display
Use this action to switch between the various display modes that Grav provides. Once you switch display mode, all previous actions will be reset. The exceptions to this rule are the lightbox and link actions and any actions that have been used before those two.
For example, the thumbnail that results from calling page.media['sample-image.jpg'].sepia().display('thumbnail').html() will not have the sepia() action applied, but page.media['sample-image.jpg'].display('thumbnail').sepia().html() will.
Warning
Once you switch to thumbnail mode, you will be manipulating an image. This means that even if your current media is a video, you can use all the image-type actions on the thumbnail.
link
Turn your media object into a link. All actions that you call before link() will be applied to the target of the link, while any actions called after will apply to what's displayed on your page.
Caution
After calling link(), Grav will automatically switch the display mode to thumbnail.
The following example will display a textual link (display('text')) to a sepia version of the sample-image.jpg file:

{{ page.media['sample-image.jpg'].sepia().link().display('text').html('Image link')|raw }}
Cache only
Grav can be set to cache all image files, this may increase the speed that files are served. However, images will go through the Grav image manipulation system which may lead to a considerably larger file size for images that have already been optimized prior to Grav. Image manipulation can be bypassed.
Enable cache_all in system/config/system.yaml
images:
  default_image_quality: 85
  cache_all: false
Disable image manipulation with the cacheoption.

{{ page.media['sample-image.jpg'].cache.html()|raw }}
lightbox
The lightbox action is essentially the same as the link action but with a few extras. Like explained above (Links and Lightboxes), the lightbox action will not do anything more than create a link with some extra attributes. It differs from the link action in that it adds a rel="lightbox" attribute and accepts a width and height attribute.
If possible (currently only in the case of images), Grav will resize your media to the requested width and height. Otherwise it will simply add a data-width and data-height attribute to the link.

{{ page.media['sample-image.jpg'].lightbox(600,400).resize(200,200).html('Sample Image')|raw }}
Result:

thumbnail
Manually choose the thumbnail Grav should use. You can choose between page and default for any type of media as well as media for image media if you want to use the media object itself as your thumbnail.

{{ page.media['sample-image.jpg'].thumbnail('default').display('thumbnail').html('Sample Image')|raw }}
Result:

attribute
This adds an additional HTML attribute to the output.

{{ page.media['sample-image.jpg'].attribute('myattribute', 'myvalue').html('Sample Image')|raw }}
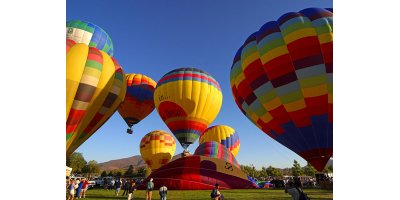
Image Actions
resize
Resizing does exactly what you would expect it to do. resize lets you create a new image based on the width and the height. The aspect ratio is maintained and the new image will contain blank areas in the color of the optional background color provided as a hex value, e.g. 0xffffff. The background parameter is optional, and if not provided will default to transparent if the image is a PNG, or white if it is a JPEG.

{{ page.media['sample-image.jpg'].resize(400, 200).html()|raw }}
Result:
forceResize
Resizes the image to the width and height as provided. forceResize will not respect original aspect-ratio and will stretch the image as needed to fit the new image size.

{{ page.media['sample-image.jpg'].forceResize(200, 300).html()|raw }}
Result:

cropResize
cropResize resizes an image to a smaller or larger size based on the width and the height. The aspect ratio is maintained and the new image will be resized to fit in the bounding-box as described by the width and height provided. In other words, any background area you would see in a regular resize is cropped.
For example, if you have an image that is 640 x 480 and you perform a cropResize(100, 100) action upon it, you will end up with an image that is 100 x 75.

{{ page.media['sample-image.jpg'].cropResize(300, 300).html()|raw }}
Result:

crop
crop will not resize the image at all, it will merely crop the original image so that only the portion of the bounding box as described by the width and the height originating from the x and y location is used to create the new image.
For example, an image that is 640 x 480 with crop(0, 0, 400, 100) will produce an image with a width of 400 and a height of 100 originating from the top-left corner as described by 0, 0.

{{ page.media['sample-image.jpg'].crop(100,100,300,200).html()|raw }}
Result:

cropZoom
Similar to regular cropResize, cropZoom also takes a width and a height but will resize and crop the image to ensure the resulting image is the exact size you requested. The aspect ratio is maintained but parts of the image may be cropped, however the resulting image is centered.
Caution
The primary difference between cropResize and cropZoom is that in cropResize, the image is resized maintaining aspect ratio so that the entire image is shown, and any extra space is considered background.
With cropZoom, the image is resized so that there is no background visible, and the extra image area of the image outside of the new image size is cropped.
For example if you have an image that is 640 x 480 and you perform a cropZoom(400, 100) action, the resulting image will be resized to 400 x 300 and then the height is cropped resulting in a 400 x 100 image.

{{ page.media['sample-image.jpg'].cropZoom(600,200).html()|raw }}
Caution
Folks familiar with using zoomCrop for this purpose will find that it also works in Grav.
Result:

quality
Dynamically allows the setting of a compression percentage value for the image between 0 and 100. A lower number means less quality, where 100 means maximum quality.

{{ page.media['sample-image.jpg'].cropZoom(300,200).quality(25).html()|raw }}
Result:

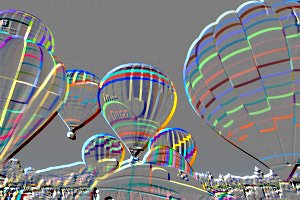
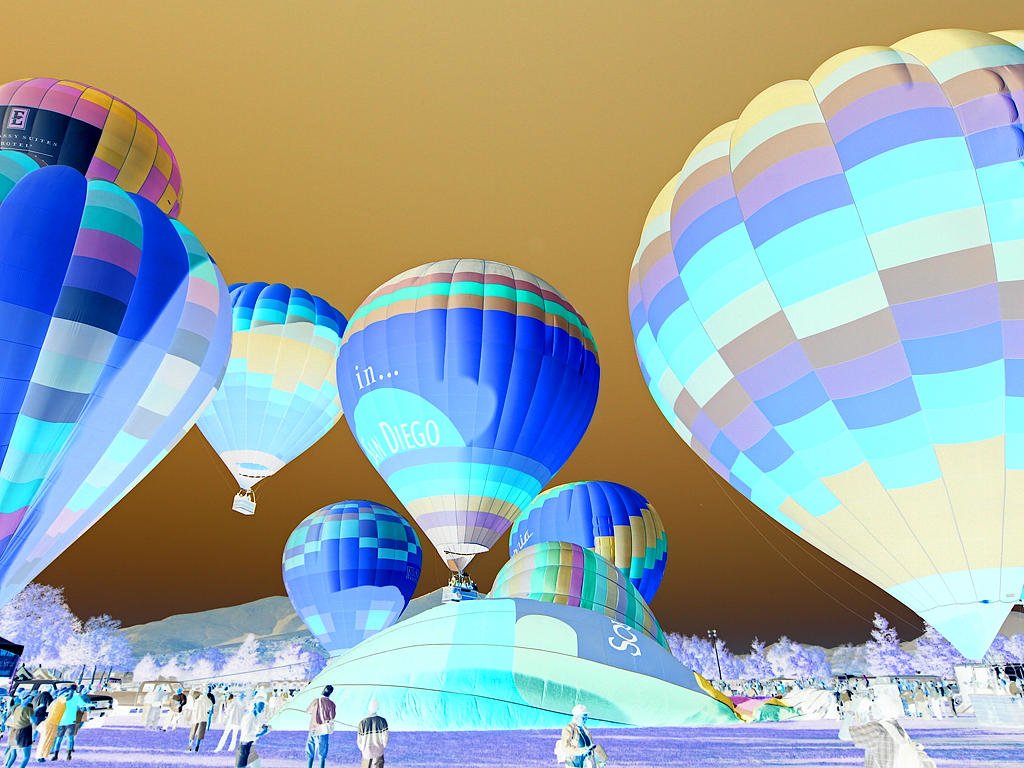
negate
Applies a negative filter to the image where colors are inverted.

{{ page.media['sample-image.jpg'].cropZoom(300,200).negate.html()|raw }}
Result:

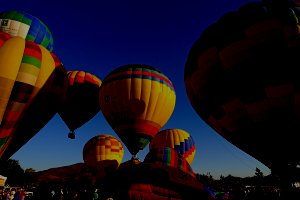
brightness
Applies a brightness filter to the image with a value from -255 to +255. Larger negative numbers will make the image darker, while larger positive numbers will make the image brighter.

{{ page.media['sample-image.jpg'].cropZoom(300,200).brightness(-100).html()|raw }}
Result:
contrast
This applies a contrast filter to the image with a value from -100 to +100. Larger negative numbers will increase the contrast, while larger positive numbers will reduce the contrast.

{{ page.media['sample-image.jpg'].cropZoom(300,200).contrast(-50).html()|raw }}

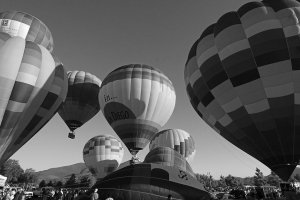
grayscale
This processes the image with a grayscale filter.

{{ page.media['sample-image.jpg'].cropZoom(300,200).grayscale.html()|raw }}
Result:
emboss
This processes the image with an embossing filter.

{{ page.media['sample-image.jpg'].cropZoom(300,200).emboss.html()|raw }}
Result:
smooth
This applies a smoothing filter to the image based on smooth value setting from -10 to 10.

{{ page.media['sample-image.jpg'].cropZoom(300,200).smooth(5).html()|raw }}
Result:

sharp
This applies a sharpening filter on the image.

{{ page.media['sample-image.jpg'].cropZoom(300,200).sharp.html()|raw }}
Result:
edge
This applies an edge finding filter on the image.

{{ page.media['sample-image.jpg'].cropZoom(300,200).edge.html()|raw }}
Result:

colorize
You can colorize the image based on adjusting the red, green, and blue values for the image from -255 to +255 for each color.

{{ page.media['sample-image.jpg'].cropZoom(300,200).colorize(100,-100,40).html()|raw }}
Result:

sepia
This applies a sepia filter on the image to produce a vintage look.

{{ page.media['sample-image.jpg'].cropZoom(300,200).sepia.html()|raw }}
Result:

gaussianBlur
blurs the image by an Factor, that defines how often the blur filter is applied to the image. Default is 1 time.

{{ page.media['sample-image.jpg'].gaussianBlur(3).html()|raw }}
Result:

rotate
rotates the image by angle degrees counterclockwise, negative values rotate clockwise.

{{ page.media['sample-image.jpg'].cropZoom(300,200).rotate(-90).html()|raw }}
Result:
flip
flips the image in the given directions. Both params can be 0|1. Both 0 is equivalent to no flipping in either direction.

{{ page.media['sample-image.jpg'].cropZoom(300,200).flip(0,1).html()|raw }}
Result:

fixOrientation
Fixes the orientation of the image when rotation is made via EXIF data (applies to jpeg images taken with phones and cameras).

{{ page.media['sample-image.jpg'].fixOrientation().html()|raw }}
watermark
The watermark action merges two images, a watermark image and a source image, into a final watermarked image. This is a very specific action that needs a more detailed description than other actions or filters. In particular, the specific behavior when combining filters must be taken into account. For those interested, there is a very detailed blog post about the watermark action, written by Vít Petira, but only in Czech. However, the instructions are easy to understand.
Warning
If you are using a page-level stream, then page prefixes must also be specified.

{{ page.media['sample-image.jpg'].watermark('user://pages/17/02.content/07.media/sample-watermark.png','top-left',50).html()|raw }}
Result:
loading
The loading attributing on images gives authors control over when the browser should start loading the resource. The value for the loading attribute can be one of auto (default), lazy, eager.
Value can be set in system.images.defaults.loading as default value, or per md image with ?loading=lazy
When value auto is chosen, no loading attribute is added and browser will determine which strategy to use.

{# Using default value as defined in 'config.system.images.defaults.loading' #}
{{ page.media['sample-image.jpg'].loading.html('Sample Image')|raw }}

{# Using explicit value #}
{{ page.media['sample-image.jpg'].loading('lazy').html('Sample Image')|raw }}
decoding
The decoding attributing on images gives authors control over when the browser should start decoding the resource. The value for the decoding attribute can be one of auto (default), sync, async.
Value can be set in system.images.defaults.decoding as default value, or per md image with ?decoding=async
When value auto is chosen, no decoding attribute is added and browser will determine which strategy to use.

{# Using default value as defined in `config.system.images.defaults.decoding` #}
{{ page.media['sample-image.jpg'].decoding.html('Sample Image')|raw }}

{# Using explicit value #}
{{ page.media['sample-image.jpg'].decoding('async').html('Sample Image')|raw }}
fetchpriority
The fetchpriority attributing gives authors control over when the browser should prioritize the fetch of the image relative to other images. The value for the fetchpriority attribute can be one of auto (default), high, low.
Value can be set in system.images.defaults.fetchpriority as default value, or per md image with ?fetchpriority=high
When value auto is chosen, no fetchpriority attribute is added and browser will determine which strategy to use.

{# Using default value as defined in `config.system.images.defaults.fetchpriority` #}
{{ page.media['sample-image.jpg'].fetchpriority.html('Sample Image')|raw }}

{# Using explicit value #}
{{ page.media['sample-image.jpg'].fetchpriority('high').html('Sample Image')|raw }}
Animated / Vectorized Actions
resize
Because PHP cannot handle dynamically resizing these types of media, the resize action will only make sure that a width and height or data-width and data-height attribute are set on your <img>/<video> or <a> tag respectively. This means your image or video will be displayed in the requested size, but the actual image or video file will not be converted in any way.

{{ page.media['sample-trailer.mov'].resize(400, 200).html('Sample Trailer')|raw }}
examples
Some examples of this:


Results:


Audio Actions
Audio media will display an HTML5 audio link:

{{ page.media['hal9000.mp3'].html()|raw }}
Result:
controls
Allows explicitly setting or removing the HTML5 default controls. Passing 0 hides browser's controls for playback, volume, etc..

{{ page.media['hal9000.mp3'].controls(0)|raw }}
preload
Allows setting of preload property, which defaults to auto. Permitted params are auto, metadata, and none.
Caution
If not set, its default value is browser-defined (i.e. each browser may have its own default value). The spec advises it to be set to
metadata.
Caution
The preload attribute is ignored if autoplay is present.

{{ page.media['hal9000.mp3'].preload('metadata')|raw }}
autoplay
Allows setting whether audio will autoplay upon page load. Defaults to false by omission if not set.
Caution
If autoplay and preload are both present on a given audio element, preload will be ignored.

{{ page.media['hal9000.mp3'].autoplay(1)|raw }}
controlsList
Allows setting of controlsList property, which takes one or more of three possible values: nodownload, nofullscreen, and noremoteplayback.
Caution
If setting more than one parameter in markdown, separate each with a dash (-). These will be replaced by spaces in the output HTML.

{{ page.media['hal9000.mp3'].controlsList('nodownload nofullscreen noremoteplayback')|raw }}
muted
Allows setting whether audio is muted on load. Defaults to false by omission if not set.

{{ page.media['hal9000.mp3'].muted(1)|raw }}
loop
Allows setting whether audio will loop upon playing through completion. Defaults to false by omission if not set.

{{ page.media['hal9000.mp3'].loop(1)|raw }}
File Actions
Grav does not provide any custom actions on files at this point in time and there are no plans to add any. Should you think of something, please contact us.
[View Text File](acronyms.txt)
<a href="{{ page.media['acronyms.txt'].url()|raw }}">View Text File</a>
Result:
Combinations
As you can see: Grav provides some powerful image manipulation functionality that makes it really easy to work with images! The real power comes when you combine multiple effects and produce some very sophisticated dynamic image manipulations. For example, this is totally valid:

{{ page.media['sample-image.jpg'].negate.lightbox.cropZoom(200,200)|raw }}
Result:
Resetting multiple calls to the same image
When you access the same image multiple times in a single page, actions you have provided to the image are not reset by default. So if you resize an image, and output the HTML, then later in the same page, simply output the image URL, you will also get the URL to the resized image. You were probably expecting the URL to the original image.
To combat this, you can reset the actions on the images by passing false to the url() method:
{% for item in page.header.gallery %}
    {% set image = page.media[item.src].cropZoom(800, 600).quality(70) %}
    <a href="{{ image.url(false)|e }}">
      <img src="{{ image.url|e }}" alt="{{ item.alt|e }}" title="{{ item.title|e }}" />
    </a>
{% endfor %}
Responsive images
Higher density displays
Grav has built-in support for responsive images for higher density displays (e.g. Retina screens). Grav accomplishes this by implementing srcset from the Picture element HTML proposal. A good article to read if you want to understand this better is this blog post by Eric Portis.
Caution
Grav sets the sizes argument mentioned in the posts above to full viewport width by default. Use the sizes action showcased below to choose yourself.
To start using responsive images, all you need to do is add higher density images to your pages by adding a suffix to the file name. If you only provide higher density images, Grav will automatically generate lower quality versions for you. Naming works as follows: [image-name]@[density-ratio]x.[image-extension], so for example adding [email protected] to your page will result in Grav creating a 2x and a 1x (regular size) version by default.
Warning
These files generated by Grav will be stored in the images/ cache folder, not your page folder.
Let's assume you have a file called [email protected], you would actually reference this in your links as retina.jpg, and then Grav will not find this image, and start looking for retina image sizes. It will find [email protected] and then realize it needs to make a @1x variant and display the appropriate srcset output:

{{ page.media['retina.jpg'].sizes('80vw').html()|raw }}
Result:
Tip
Depending on your display and your browser's implementation and support for srcset, you might never see a difference.
Sizes with media queries
Grav also has support for media queries inside the sizes attribute, allowing you to use different widths depending on the device's screen size. In contrast to the first method, you don't have to create multiple images; they will get created automatically. The fallback image is the current image, so a browser without support for srcset, will display the original image.

{{ page.media['retina.jpg'].sizes('(max-width:26em) 100vw, 50vw').html('Retina Image')|raw }}
Result:
Tip
Depending on your display and your browser's implementation and support for srcset, you might never see a difference.
Sizes with media queries using derivatives
If you want to customize the sizes of the automatically created files, you can use the derivatives() method (as shown below). The first parameter is the width of the smallest of the generated images. The second is the maximum width (exclusive) of the generated images. The third, and only optional parameter, dictates the intervals with which to generate the photos (default is 200). For example, if you set the first parameter to be 320 and the third to be 100, Grav will generate an image for 320, 420, 520, 620, and so on until it reaches its set maximum.
In our example, we set the maximum to 1600. This will result in increments of 300 being met from 320 to 1520 as 1620 would be above the threshold.
Caution
For the moment it does not work inside markdown, only in your twig files.

{{ page.media['retina.jpg'].derivatives(320,1600,300).sizes('(max-width:26em) 100vw, 50vw').html()|raw }}
Result:
Tip
Depending on your display and your browser's implementation and support for srcset, you might never see a difference.
Manual size definition
Instead of letting Grav generate the sizes in even steps between given boundaries, you may manually define which sizes Grav should generate:

This will generate downsized versions of the retina.jpg image in three widths: 360, 720 and 1200px.
Metafiles
Every medium that you reference in Grav, e.g. image1.jpg, sample-trailer.mov, or even archive.zip has the ability to have variables set or even overridden via a metafile. These files take the format of <filename>.meta.yaml. For example, for an image with the filename image1.jpg you could create a metafile called image1.jpg.meta.yaml.
You can add just about any setting or piece of metadata you would like using this method.
The contents of this file should be in YAML syntax, an example could be:
image:
    filters:
        default:
            - [cropResize, 300, 300]
            - sharp
alt_text: My Alt Text
If you are using this method to add file-specific styling or meta tags for a single file, you will want to put the YAML file in the same folder as the referenced file. This will ensure that the file is pulled along with the YAML data. It's a handy way to even set file-specific metadata as you are unable to do so from the page itself.
Let's say you wanted to just pull the alt_text value listed for the image file sample-image.jpg. You would then create a file called sample-image.jpg.meta.yaml and place it in the folder with the referenced image file. Then, insert the data used in the example above and save that YAML file. In the markdown file for the page, you can display this data by using the following line:
{{ page.media['sample-image.jpg'].meta.alt_text|e }}
This will pull up the example phrase My Alt Text instead of the image. This is just a basic example. You can use this method for a number of things, including creating a gallery with multiple unique data points you want to have referenced for each image. Your images, in essence, have a set of data unique to them that can be easily referenced and pulled as needed.
Video Options
In-line video control options are another capability baked into Grav. These options, added in-line with the file name, give you the ability to determine an embedded video's autoplay, controls, and loop settings.
Here is an example:

The options are as follows:
| Attribute | Explanation |
|---|---|
| autoplay | Enables (1) or Disables (0) autoplay for the video on pageload. |
| controls | Enables (1) or Disables (0) media controls for the embedded video. |
| loop | Enables (1) or Disables (0) automatic looping for the video, replaying it as it ends. |
| muted | Mute video and generally allow it to autoplay. |