WireNine
WireNine is a fast, modern hosting provider that focuses on performance via their use of 100% SSD storage, Litespeed web servers, the latest Intel E5-based processors with fast DDR4 ram. These features ensure their shared hosting offerings are a fantastic solution for Grav sites.

In this guide, we will cover the essentials for configuring a middle of the road shared hosting account to work optimally with Grav.
Picking your Hosting Plan
WireNine has three shared hosting plans that range from $9/month for a basic plan, to $18/month for their heavy traffic option. Configuration for all of these plans are the same, but we recommend the middle Plus plan at $14/month because it provides a good compromise with 1 CPU and 1GB of memory.
Enabling SSH
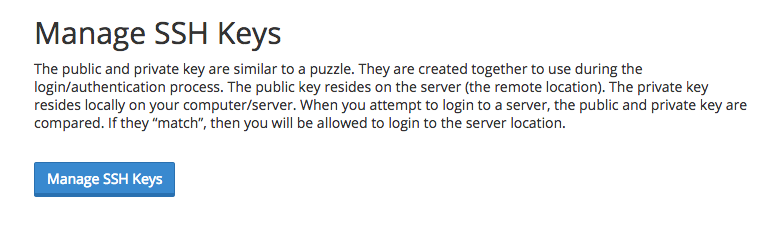
First, you will have to open the SSH Access option in the Security section of cPanel. On this SSH Access page, you should click the Manage SSH Keys button.
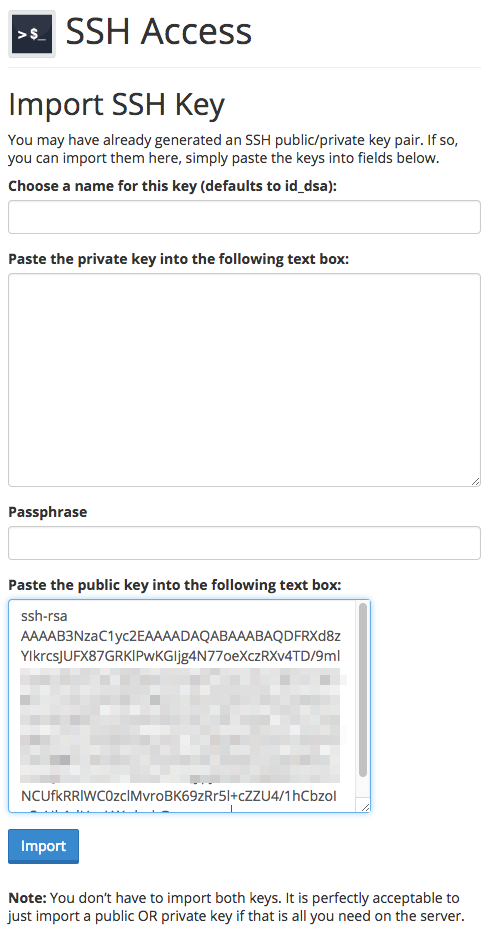
There are two options at this point. Generate a New Key, or Import Key. It's simpler to create your public/private key pair locally on your computer and then just import the DSA Public Key.
Caution
Windows users will first need to install Cygwin to provide many useful GNU and open source tools that are available on Mac and Linux platforms. When prompted to choose packages, ensure you check the SSH option. After installation, launch the Cygwin Terminal
Fire up a terminal window and type:
ssh-keygen -t dsa
This key generation script will prompt you to fill in some values, or you can just hit [return] to accept the default values. This will create an id_dsa (private key), and an id_dsa.pub (public key) in a folder called .ssh/ in your home directory. It is important to ensure you NEVER give out your private key, nor upload it anywhere, only your public key.
Once generate you can paste the contents of your id_dsa.pub public key into the Public Key field in the Import SSH key section of the SSH Access page:
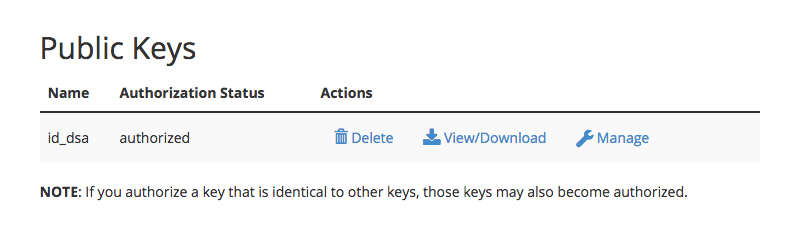
After uploading, you should see the key listed at the Public Keys section of the Manage SSH Keys page. You then need to click Manage to ensure the key is authorized:
Caution
WireNine does not seem to enable Shell Access on their accounts by default. You will need to open a support ticket, and request shell access to be enabled for your account.
This means you are ready to test ssh'ing to your server.
ssh wirenine_username@wirenine_servername -p2200
Obviously, you will need to put in your WireNine-provided username for wirenine_username, and the WireNine-provided servername for wirenine_servername. The -p2200 is important as this is the non-standard port that WireNine runs SSH on.
403 Forbidden Errors
It seems in some WireNine setups the default permissions on user created files are incorrect and will cause 403 Forbidden errors due to security flags being triggered. The issue is that the default umask is incorrect and files are created with 775 for folders and 664 for files. These files need to be 755 and 644 respectively to work correctly.
This should be setup automatically but is not currently. However, the fix is easy. Just edit your .bash_profile file and add this line to the bottom of it.
umask 022
You will need to re-login to your terminal to get this change picked up.
Configuring PHP & Caching
WireNine uses PHP 5.4 by default, but you do have the option to use the newer 5.5, 5.6, or 7.0 versions. Grav requires at least PHP 5.5.9 to operate.
WireNine provides a very full-featured cPanel control panel. This is directly accessible via the My Accounts tab.
The first thing to do is to change the default version of PHP your site runs with. So click the Select PHP Version link in the Software Section.
You will see a page that shows the current version of PHP. Below is a dropdown that let's you pick alternative versions. Choose 5.6 and click Set as current button.
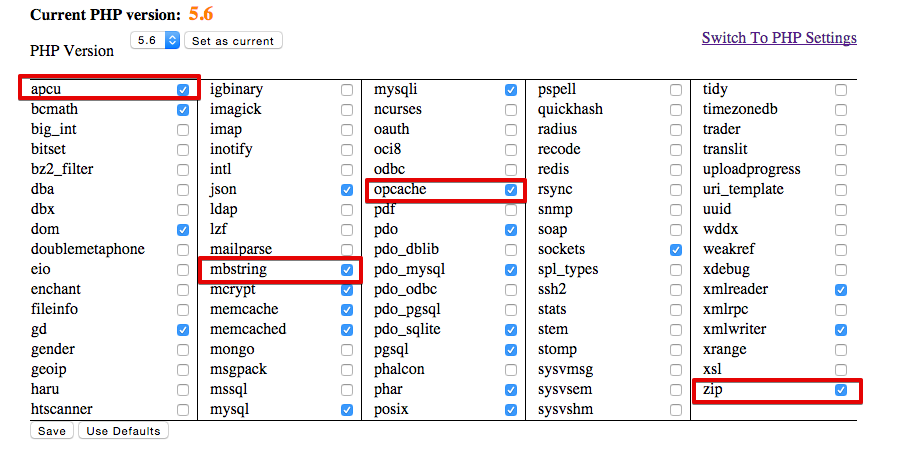
You will first need to enable mbstring and zip extension.
WireNine is a rare bread in the world of hosting providers, in that they provide some sophisticated caching extensions for PHP. To take advantage of these, enable the apcu caching extension, and also the Zend opcache extension. Then, click Save at the bottom of these options.
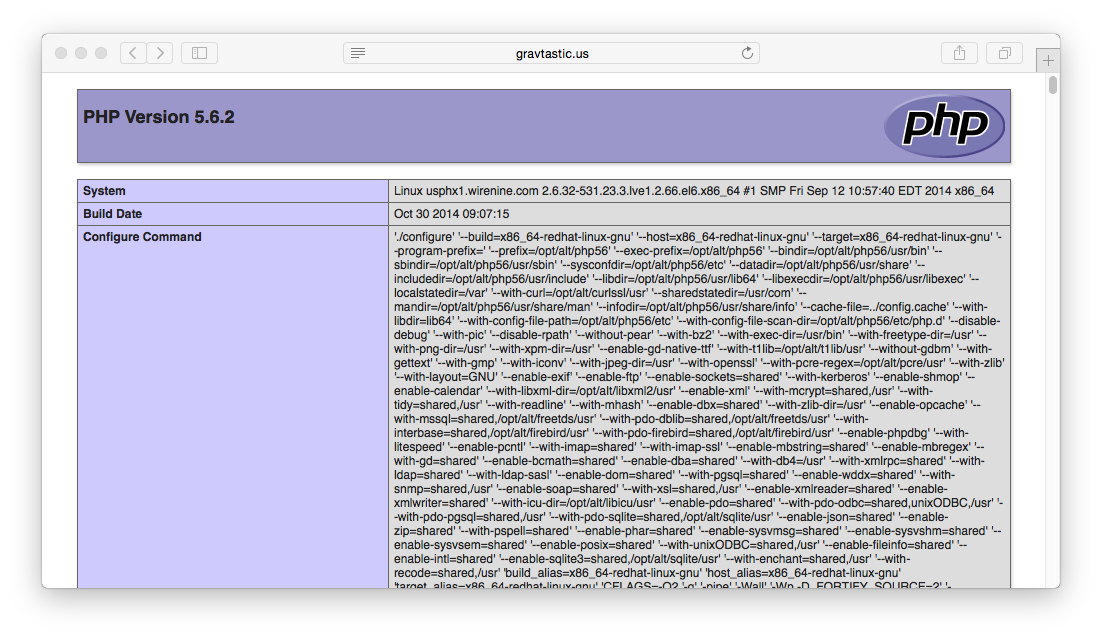
To test that you have the correct version of PHP, Zend OPcache, and APCu running, you can create a temporary file: public_html/info.php and put this in the contents:
1<?php phpinfo();
Save the file and point your browser to this info.php file on your site, and you should be greeted with PHP information reflecting the version you selected earlier:
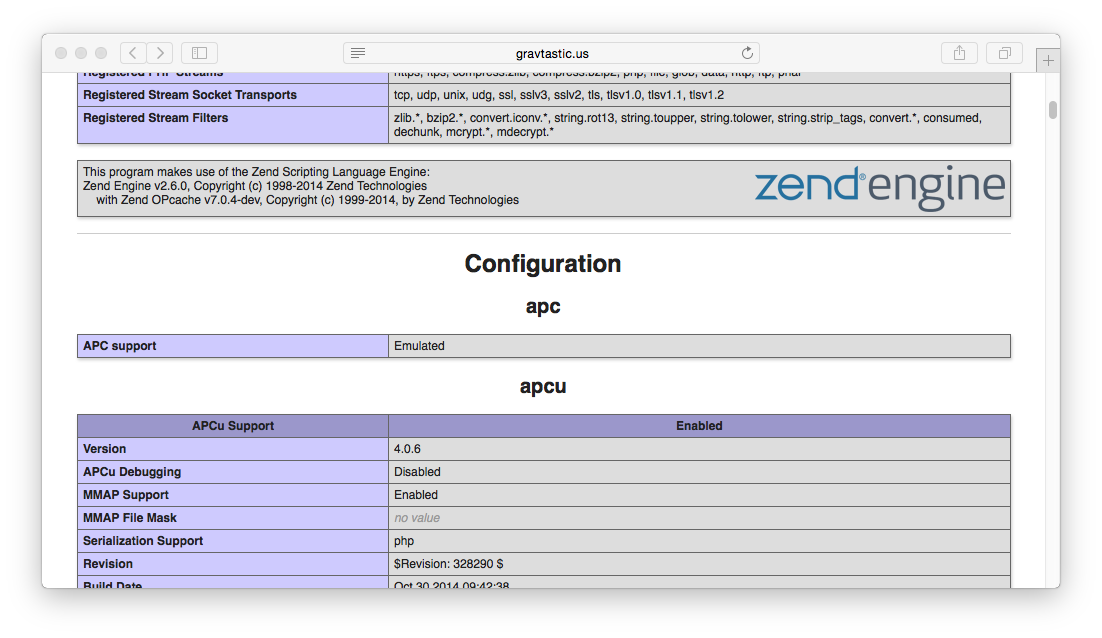
You should also be able to scroll down and see Zend OPcache listed in the zend engine block, and an APCu section below it:
Install and Test Grav
Using your new found SSH capabilities, let's SSH to your WireNine server (if you are not already there) and download the latest version of Grav, unzip it and test it out!
We will extract Grav into a /grav subfolder, but you could unzip directly into the root of your ~/public_html/ folder to ensure Grav is accessible directly.
cd ~/public_html
wget https://getgrav.org/download/core/grav/latest
unzip grav-v2.0.8.zip
You should now be able to point your browser to http://mywirenineserver.com/grav using the appropriate URL of course.
Because you have followed these instructions diligently, you will also be able to use the Grav CLI and Grav GPM commands such as:
cd ~/public_html/grav
bin/grav clear-cache

Clearing cache

Cleared:  cache/twig/*
Cleared:  cache/doctrine/*
Cleared:  cache/compiled/*
Cleared:  cache/validated-*
Cleared:  images/*
Cleared:  assets/*

Touched: /home/your_user/public_html/grav/user/config/system.yaml
Alternate Install Method: Softaculous
[ui-callout] [ui-callout-item title="Portal/CMS" position="67%, 20%, se"]Selecting this category will take you to a page where you can find the Grav CMS.
[/ui-callout-item]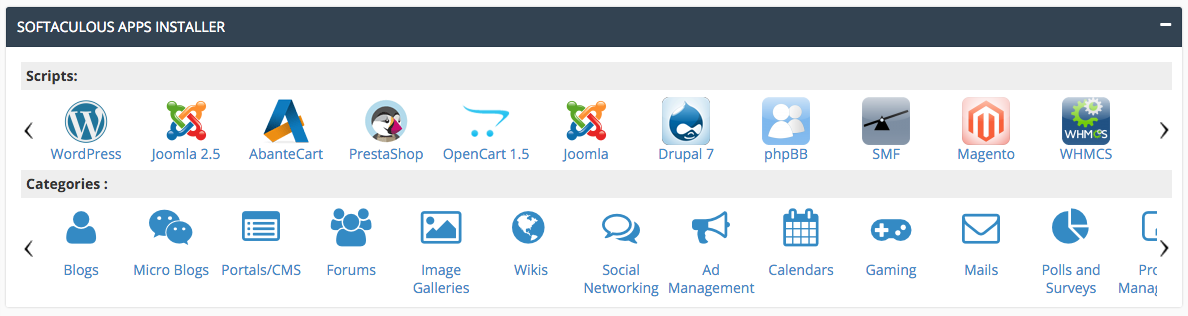
Available in Cpanel, Softaculous is a quick-and-easy installation method for Grav. You will find it at the bottom of your Cpanel dashboard in the Portals/CMS category. Once you have selected that category, you can scroll down and find the Grav entry.
[ui-callout] [ui-callout-item title="Download" position="67%, 85%, se"]Selecting the download icon will take you to the product page for Grav.
[/ui-callout-item]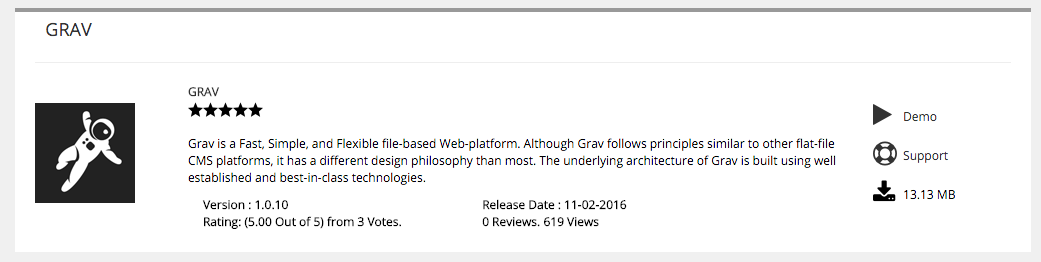
At this point, you can select the Download icon to progress to the main product page for Grav. This page includes additional information, as well as the link where you can install Grav directly to your server.
[ui-callout] [ui-callout-item title="Download" position="28%, 5%, se"]Selecting the download icon will take you to the installation page for Grav.
[/ui-callout-item]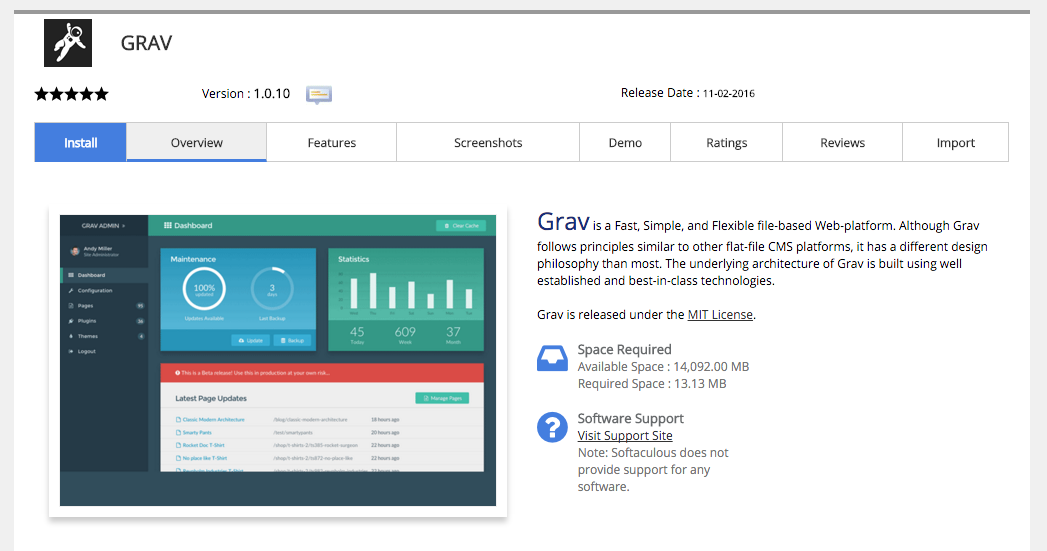
Once there, you can select the blue Install button in the upper-left area of the page to begin the installation process. This will take you to a configuration page enabling you to set up your Grav install, including the directory you wish to install it to, and an Admin account so you can hit the ground running in the Grav Admin.
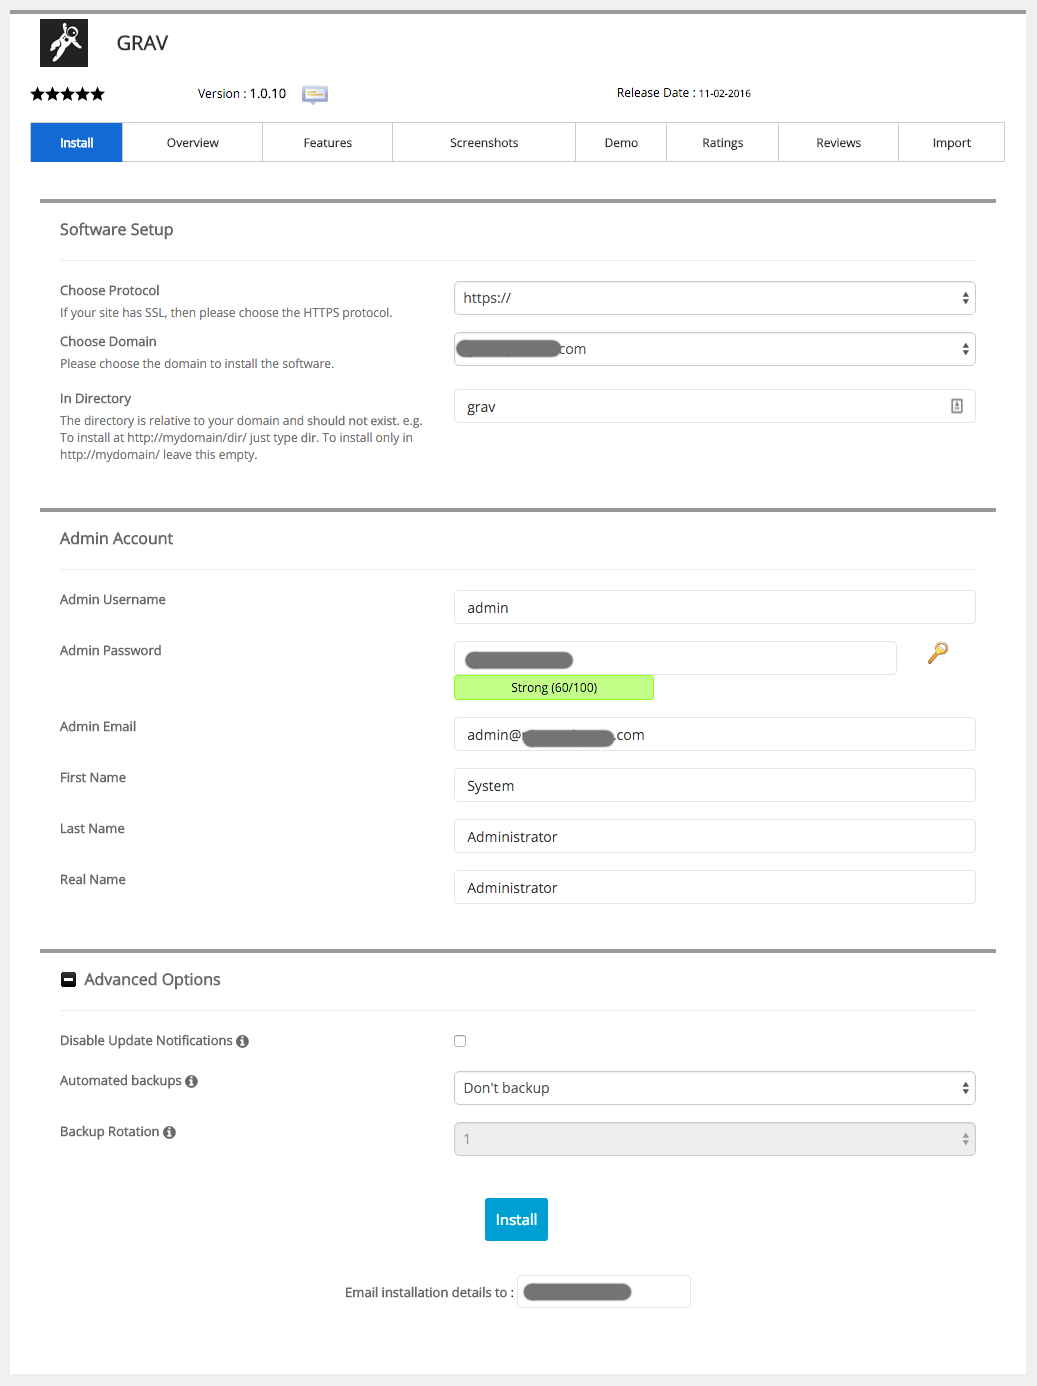
Once you have configured this page as you would like, you're good to go!