Theme Tutorial
Often, the best way to learn a new thing is to use an example, and then try to build your own creation from it. We are going to use this same methodology for creating a new Grav theme.
Quark
Grav comes with a clean and modern theme called Quark which uses the Spectre.css framework.
Spectre.css is a lightweight, responsive and modern CSS framework for faster and extensible development.
Spectre provides basic styles for typography and elements, flexbox based responsive layout system, pure CSS components and utilities with best practice coding and consistent design language.
However, it's often better to start from something even simpler.
Pure.css
For the sake of this tutorial, we will create a theme that utilizes the popular Pure.css framework developed by Yahoo!
Pure is a small, fast, and responsive CSS framework that contains the basics to get you developing your site without the overhead of larger frameworks such as Bootstrap or Foundation. It contains several modules that can be used independently, but all together the resulting package is only 4.0KB minified and gzipped!
You can read up on all the features Pure brings to the table on the Pure.css project site.
Also, you should read the Important Theme Updates blog article that outlines some key changes in Grav themes to provide the best plugin support going forward.
Step 1 - Install DevTools Plugin
Caution
Previous versions of this tutorial required creating a base theme by default. This whole process can be skipped thanks to our new DevTools Plugin
The first step in creating a new theme is to install the DevTools Plugin. This can be done in two ways.
Install via CLI GPM
- Navigate in the command line to the root of your Grav installation.
bin/gpm install devtools
Install via Admin Plugin
- After logging in, simply navigate to the Plugins section from the sidebar.
- Click the Add button in the top right.
- Find DevTools in the list and click the Install button.
Step 2 - Create Base Theme
For this next step you really do need to be in the command line as the DevTools provide a couple of CLI commands to make the process of creating a new theme much easier!
From the root of your Grav installation enter the following command:
bin/plugin devtools new-theme
This process will ask you a few questions that are required to create the new theme:
Warning
We're going to use pure-blank to create a new theme, but you can create a simple inheritance style template that inherits from another base theme
bin/plugin devtools new-theme

Enter Theme Name: MyTheme
Enter Theme Description: My New Theme
Enter Developer Name: Acme Corp
Enter Developer Email: [email protected]
Please choose a template type
  [pure-blank ] Basic Theme using Pure.css
  [inheritance] Inherit from another theme
  [copy       ] Copy another theme
 > pure-blank

SUCCESS theme mytheme -> Created Successfully

Path: /www/user/themes/my-theme
The DevTools command tells you where this new template was created. This created template is fully functional but also very simple. You will want to modify this to suit your needs.
In order to see your new theme in action, you will need to change the default theme from quark to my-theme, so edit your user/config/system.yaml and change it:
 1...
 2pages:
 3    theme: my-theme
 4...
Reload your site in your browser and you should see the theme has now changed.
Step 3 - Theme Basics
Now we've created a new basic theme that can be modified and developed, let's break it down and have a look at what makes up a theme. If you look in the user/themes/my-theme folder you will see:
.
├── CHANGELOG.md
├── LICENSE
├── README.md
├── blueprints.yaml
├── css
│   └── custom.css
├── fonts
├── images
│   └── logo.png
├── js
├── my-theme.php
├── my-theme.yaml
├── screenshot.jpg
├── templates
│   ├── default.html.twig
│   ├── error.html.twig
│   └── partials
│       ├── base.html.twig
│       └── navigation.html.twig
└── thumbnail.jpg
This is a sample structure but some things are required:
Required Items to Function
These items are critical and your theme will not function reliably unless you include these in your theme.
blueprints.yaml- The configuration file used by Grav to get information on your theme. It can also define a form that the admin can display when viewing the theme details. This form will let you save settings for the theme. This file is documented in the Forms chapter.my-theme.php- This file will be named according to your theme, but can be used to house any logic your theme needs. You can use any plugin event hook exceptonPluginsInitialized(), however there is a theme specificonThemeInitialized()hook specific for themes that you can use instead.my-theme.yaml- This is the configuration used by the plugin to set options the theme might use.templates/- This is a folder that contains the Twig templates to render your pages.
Required Items for Release
These items are required if you wish to release your theme via GPM.
CHANGELOG.md- A file that follows the Grav Changelog Format to show changes in releases.LICENSE- a license file, should probably be MIT unless you have a specific need for something else.README.md- A 'Readme' that should contain any documentation for the theme. How to install it, configure it, and use it.screenshot.jpg- 1009px x 1009px screenshot of the theme.thumbnail.jpg- 300px x 300px screenshot of the theme.
Step 4 - Base Template
As you know from the previous chapter, each item of content in Grav has a particular filename, e.g. default.md, which instructs Grav to look for a rendering Twig template called default.html.twig. It is possible to put everything you need to display a page in this one file, and it would work fine. However, there is a better solution.
Utilizing the Twig Extends tag you can define a base layout with blocks that you define. This enables any twig template to extend the base template, and provides definitions for any block defined in the base. So look at the templates/default.html.twig file and examine its content:
 1{% extends 'partials/base.html.twig' %}
 2
 3{% block content %}
 4    {{ page.content|raw }}
 5{% endblock %}
There are really two things going on here.
First, the template extends a template located in partials/base.html.twig.
Warning
You don't need to include templates/ within Twig templates as Twig is already looking in templates/ as the root level for any template.
Second, the content block is overridden from the base template, and the page's content is output in its place.
Caution
For consistency, it's a good idea to use the templates/partials folder to contain Twig templates that represent either little chunks of HTML, or are shared. We also use templates/modular for modular templates, and templates/forms for any forms. You can create any sub-folders you like if you prefer to organize your templates differently.
If you look at the templates/partials/base.html.twig you will see the meat of the HTML layout:
 1{% set theme_config = attribute(config.themes, config.system.pages.theme) %}
 2<!DOCTYPE html>
 3<html lang="{{ (grav.language.getActive ?: theme_config.default_lang)|e }}">
 4<head>
 5{% block head %}
 6    <meta charset="utf-8" />
 7    <title>{% if header.title %}{{ header.title|e }} | {% endif %}{{ site.title|e }}</title>
 8
 9    <meta http-equiv="X-UA-Compatible" content="IE=edge">
10    <meta name="viewport" content="width=device-width, initial-scale=1">
11    {% include 'partials/metadata.html.twig' %}
12
13    <link rel="icon" type="image/png" href="{{ url('theme://images/logo.png')|e }}" />
14    <link rel="canonical" href="{{ page.url(true, true)|e }}" />
15{% endblock head %}
16
17{% block stylesheets %}
18    {% do assets.addCss('http://yui.yahooapis.com/pure/0.6.0/pure-min.css', 100) %}
19    {% do assets.addCss('https://maxcdn.bootstrapcdn.com/font-awesome/4.5.0/css/font-awesome.min.css', 99) %}
20    {% do assets.addCss('theme://css/custom.css', 98) %}
21{% endblock %}
22
23{% block javascripts %}
24    {% do assets.addJs('jquery', 100) %}
25{% endblock %}
26
27{% block assets deferred %}
28    {{ assets.css()|raw }}
29    {{ assets.js()|raw }}
30{% endblock %}
31
32</head>
33<body id="top" class="{{ page.header.body_classes|e }}">
34
35{% block header %}
36    <div class="header">
37        <div class="wrapper padding">
38            <a class="logo left" href="{{ (base_url == '' ? '/' : base_url)|e }}">
39                <i class="fa fa-rebel"></i>
40                {{ config.site.title|e }}
41            </a>
42            {% block header_navigation %}
43            <nav class="main-nav">
44                {% include 'partials/navigation.html.twig' %}
45            </nav>
46            {% endblock %}
47        </div>
48    </div>
49{% endblock %}
50
51{% block body %}
52    <section id="body">
53        <div class="wrapper padding">
54        {% block content %}{% endblock %}
55        </div>
56    </section>
57{% endblock %}
58
59{% block footer %}
60    <div class="footer text-center">
61        <div class="wrapper padding">
62            <p><a href="https://getgrav.org">Grav</a> was <i class="fa fa-code"></i> with <i class="fa fa-heart"></i> by <a href="http://www.rockettheme.com">RocketTheme</a>.</p>
63        </div>
64    </div>
65{% endblock %}
66
67{% block bottom %}
68    {{ assets.js('bottom')|raw }}
69{% endblock %}
70
71</body>
Warning
TIP: If a variable is safe to render and contains HTML, always use the |raw filter to make the template work with autoescape turned on.
Caution
It is very important to either turn on the autoescape setting in System Configuration or to remember to escape every single variable in template files to make your site safe against XSS attacks.
Step 5 - Breaking it Down
Please read over the code in the base.html.twig file in order to better understand what is happening. There are several key things to note:
-
A
theme_configvariable is set with the theme configuration. Because Twig doesn't work well with dashes, to retrieve variables with dashes (e.g.config.themes.my-theme), we use theattribute()Twig function to dynamically retrieve themy-themedata fromconfig.themes. -
The
<html lang=...item is set based on Grav's active language if enabled, else it uses thedefault_langas set in thetheme_config. -
The
{% block head %}{% endblock head %}syntax defines an area in the base Twig template. Note that the use ofheadin the{% endblock head %}tag is not required, but is used here for readability. In this block we put things that are typically located in the HTML<head>tag. -
The
<title>tag is dynamically set based on the page'stitlevariable as set in the page header. Theheader.titleis a shortcut method but is equivalent topage.header.title. -
After a couple of standard meta tags are set, there is a reference to include
partials/metadata.html.twig. This file is located in thesystems/templates/partialsfolder and contains a loop that loops over the page's metadata. This is actually a merge of metadata fromsite.yamland any page-specific overrides. -
The
<link rel="icon"...entry is set by pointing to a theme-specific image. In this case it's located in theme directory underimages/logo.png. The syntax for this is{{ url('theme://images/logo.png') }}. -
The
<link rel="canonical"...entry sets a canonical URL for the page that is always set to the full URL of the page via{{ page.url(true, true) }}. -
Now we define a block called
stylesheets, and in here we use the Asset Manager to add several assets. The first one loads the Pure.css framework. The second one loads FontAwesome to provide useful icons. The last entry points to acustom.cssfile in the theme'scss/folder. In here are a few useful styles to get you started, but you can add more here. Also you can add other CSS file entries as needed. -
The
{{ assets.css()|raw }}call is what triggers the template to render all the CSS link tags. -
The
javascriptsblock, like thestylesheetsblock is a good place to put your JavaScript files. In this example, we only add the 'jquery' library which is already bundled with Grav, so you don't need to provide a path to it. -
The
{{ assets.js()|raw }}will render all the JavaScript tags. -
The
<body>tag has a class attribute that will output anything you set in thebody_classesvariable of the page's frontmatter. -
The
headerblock has a few things that output the HTML header of the page. One important thing to note is the logo is hyperlinked to thebase_urlwith the logic:{{ base_url == '' ? '/' : base_url }}. This is to ensure that if there is no subdirectory, the link is just/. -
The title of the site is output as the logo in this example theme with
{{ config.site.title }}but you could just replace this with a<img>tag to a logo if you wanted. -
The
<nav>tag actually contains a link topartials/navigation.html.twigthat contains the logic to loop over any visible pages and display them as a menu. By default it supports dropdown menus for nested pages, but this can be turned off via the theme's configuration. Have a look in this navigation file to get an idea of how the menu is generated. -
The use of
{% block content %}{% endblock %}provides a placeholder that allows us to provide content from a template that extends this one. Remember we overrode this indefault.html.twigto output the page's content. -
The
footerblock contains a simple footer, you can easily modify this for your needs. -
Similar to the content block, the
{% block bottom %}{% endblock %}is intended as a placeholder for templates to add custom JavaScript initialization or analytic codes. In this example, we output any JavaScript that was added to thebottomAsset Group. Read more about this in the Asset Manager documentation.
Step 6 - Theme CSS
You might have noticed that in the partials/base.html.twig file we made reference to a custom theme css via Asset Manager: do assets.add('theme://css/custom.css', 98). This file will house any custom CSS we need to fill in the gaps not provided by the Pure.css framework. As Pure is a very minimal framework, it provides the essentials but almost no styling.
- In your
user/themes/my-theme/cssfolder, take a look atcustom.css:
 1/* Core Styles */
 2* {
 3    -webkit-box-sizing: border-box;
 4    -moz-box-sizing: border-box;
 5    box-sizing: border-box;
 6}
 7
 8body {
 9    font-size: 1rem;
10    line-height: 1.7;
11    color: #606d6e;
12}
13
14h1,
15h2,
16h3,
17h4,
18h5,
19h6 {
20    color: #454B4D;
21}
22
23a {
24    color: #1F8CD6;
25    text-decoration: none;
26}
27
28a:hover {
29    color: #175E91;
30}
31
32pre {
33    background: #F0F0F0;
34    margin: 1rem 0;
35    border-radius: 2px;
36}
37
38blockquote {
39    border-left: 10px solid #eee;
40    margin: 0;
41    padding: 0 2rem;
42}
43
44/* Utility Classes */
45.wrapper {
46    margin: 0 3rem;
47}
48
49.padding {
50    padding: 3rem 1rem;
51}
52
53.left {
54    float: left;
55}
56
57.right {
58    float: right
59}
60
61.text-center {
62    text-align: center;
63}
64
65.text-right {
66    text-align: right;
67}
68
69.text-left {
70    text-align: left;
71}
72
73/* Content Styling */
74.header .padding {
75    padding: 1rem 0;
76}
77
78.header {
79    background-color: #1F8DD6;
80    color: #eee;
81}
82
83.header a {
84    color: #fff;
85}
86
87.header .logo {
88    font-size: 1.7rem;
89    text-transform: uppercase;
90}
91
92.footer {
93    background-color: #eee;
94}
95
96/* Menu Settings */
97.main-nav ul {
98    text-align: center;
99    letter-spacing: -1em;
100    margin: 0;
101    padding: 0;
102}
103
104.main-nav ul li {
105    display: inline-block;
106    letter-spacing: normal;
107}
108
109.main-nav ul li a {
110    position: relative;
111    display: block;
112    line-height: 45px;
113    color: #fff;
114    padding: 0 20px;
115    white-space: nowrap;
116}
117
118.main-nav > ul > li > a {
119    border-radius: 2px;
120}
121
122/*Active dropdown nav item */
123.main-nav ul li:hover > a {
124    background-color: #175E91;
125}
126
127/* Selected Dropdown nav item */
128.main-nav ul li.selected > a {
129    background-color: #fff;
130    color: #175E91;
131}
132
133/* Dropdown CSS */
134.main-nav ul li {position: relative;}
135
136.main-nav ul li ul {
137    position: absolute;
138    background-color: #1F8DD6;
139    min-width: 100%;
140    text-align: left;
141    z-index: 999;
142
143    display: none;
144}
145.main-nav ul li ul li {
146    display: block;
147}
148
149/* Dropdown CSS */
150.main-nav ul li ul ul {
151    left: 100%;
152    top: 0;
153}
154
155/* Active on Hover */
156.main-nav li:hover > ul {
157    display: block;
158}
159
160/* Child Indicator */
161.main-nav .has-children > a {
162    padding-right: 30px;
163}
164.main-nav .has-children > a:after {
165    font-family: FontAwesome;
166    content: '\f107';
167    position: absolute;
168    display: inline-block;
169    right: 8px;
170    top: 0;
171}
172
173.main-nav .has-children .has-children > a:after {
174    content: '\f105';
175}
This is pretty standard CSS that sets some basic margins, fonts, colors, and utility classes. There is some basic content styling and some more extensive styling required to render the drop-down menu. Feel free to modify this file as you need, or even add new CSS files (just ensure you add a reference in the head block by following the example for custom.css).
Step 7 - Testing
To see your theme in action, open your browser, and point it to your Grav site. You should see something like this:
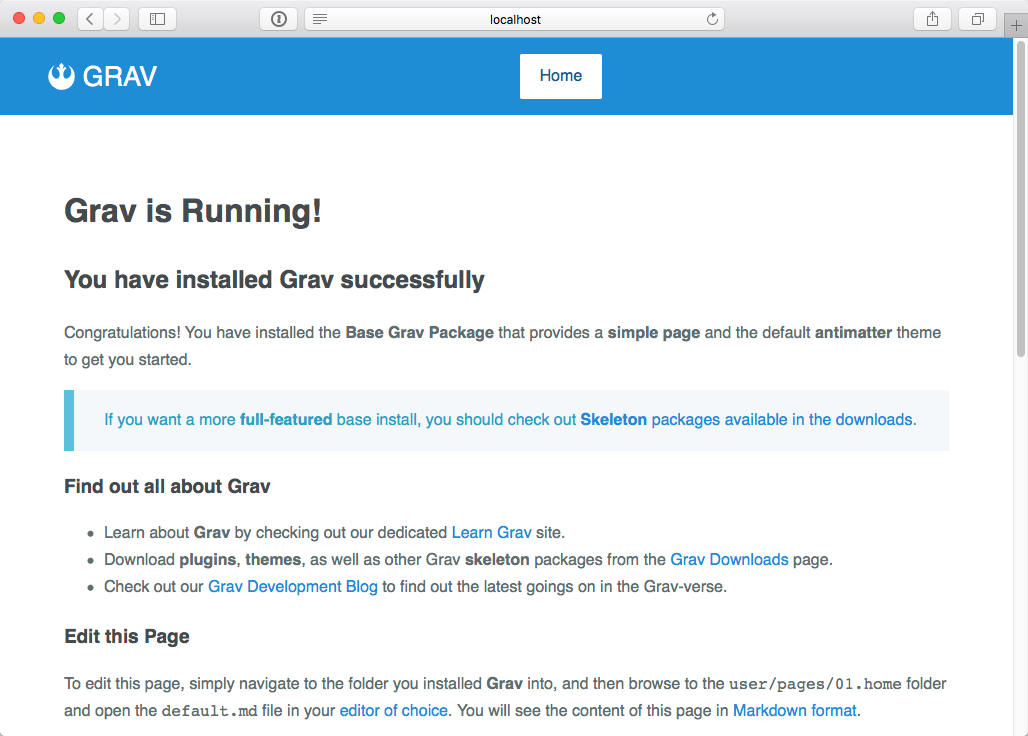
Congratulations, you have created your first theme!